In this post I will create a simple Ionic app that pulls from a wordpress site and displays the posts in the app. Before following the next steps make sure Node.js and npm are installed.
Install the Ionic CLI
This command will install the Ionic CLI globally on the system. The -g means it is a global install.
npm install -g ionicCreate the app
Next create the app with the ionic start command.
ionic startDepending on the version of the Ionic CLI installed this may prompt us to continue creating an Ionic 3 application or choose the new Ionic 4 application. Choose Ionic 4.
Next give the app a name, I will call this app ‘TutorialApp’.
Next it will ask us to select a starter template. There are 3 types of templates
- blank | A blank starter project
- sidemenu | A starting project with a side menu with navigation in the content area
- tabs | A starting project with a simple tabbed interface
For this tutorial we’ll choose sidemenu.
It will then prompt you to use the AppFlowSDK, say no to this.
Launch the app
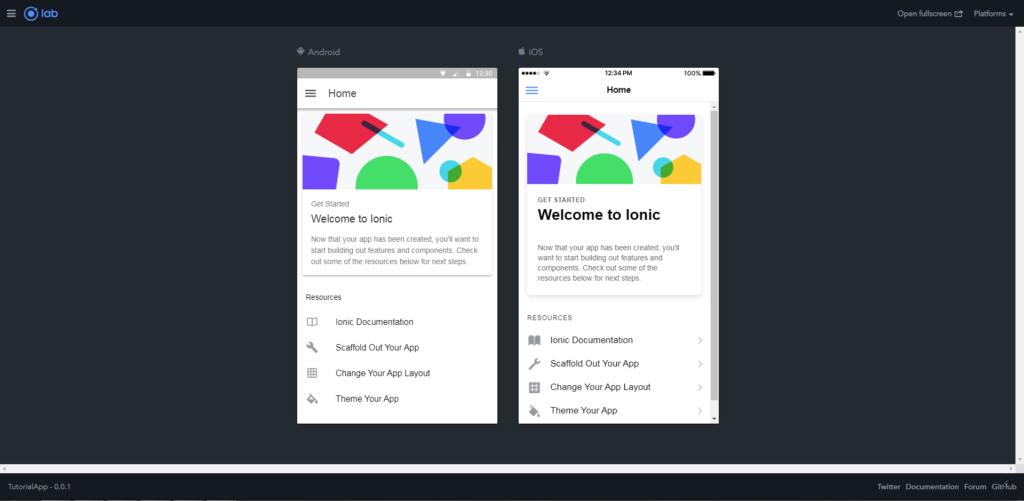
cd .\TutorialAppionic serve - lThe -l is to launch the Ionic Lab view, which should look something like the below.
Project Structure
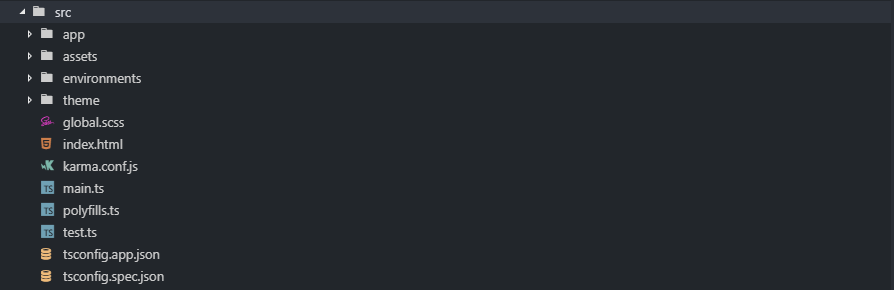
The ionic start command creates a project structure with a src/ directory like the following. This directory contains items such as the index.html file, configuration files for tests, an asset folder for images, and the main app/ directory for the app’s code.
Creating a WordPress Service
Before creating the service add the following import to the src/app.module.ts file.
import { HttpClientModule } from '@angular/common/http';Then add the HttpClientModule to the @NgModule imports.
@NgModule({
  declarations: [AppComponent],
  entryComponents: [],
  imports: [
    BrowserModule,
    IonicModule.forRoot(),
    AppRoutingModule,
    HttpClientModule
  ],
  providers: [
    WordPressRestapiService,
    StatusBar,
    SplashScreen,
    { provide: RouteReuseStrategy, useClass: IonicRouteStrategy }
  ],
  bootstrap: [AppComponent]
})
Now install rxjs with the following command
npm install --save rxjsNext create a service to handle the API calls to the WordPress website which will return the data for the app.
ionic g service services/wordpress-restapiThis will create 2 new files, wordpress-restapi.service.ts and wordpress-restapi.service.spec.ts under src/app/services/.
Open the wordpress-restapi.service.ts file and update it with the following.
import { Injectable } from '@angular/core';
import { HttpClient } from '@angular/common/http';
import { Observable } from 'rxjs';
import { catchError, map } from 'rxjs/operators';

@Injectable({
  providedIn: 'root'
})
export class WordPressRestapiService {

  baseRestApiUrl: string = 'http://example.com/wp-json/wp/v2/';

  constructor(private httpClient: HttpClient) { }

  getRecentPosts(categoryId: number, page: number = 1): Observable<Post[]> {
    // Get posts by a category if a category id is passed
    let category_url = categoryId ? ("&categories=" + categoryId) : "";

    return this.httpClient.get(this.baseRestApiUrl + "posts?page=" + page + category_url).pipe(
      map((posts: Post[]) => {
        return posts.map((post) => new Post(post));
      }),
      catchError(error => {
        return Observable.throw('Something went wrong ;)');
      })
    );
  }
}

export class Post {
  author: number;
  categories: number[];
  comment_status: string;
  content: object;
  date: string;
  date_gmt: string;
  excerpt: object;
  featured_media: number;
  format: string;
  guid: object;
  id: number;
  link: string;
  meta: object;
  modified: string;
  modified_gmt: string;
  ping_status: string;
  slug: string;
  status: string;
  sticky: boolean;
  tags: number[];
  template: string;
  title: object;
  type: string;
  _links: object;

  constructor(values: Object = {}) {
    Object.assign(this, values);
  }
}
The getRecentPosts() function will retrieve the latest posts from the blog. Be sure to change the baseRestApiUrl with the live domain. We can pass a category id to get posts from a specific category or a page which will get return the next set of posts.
Displaying the posts
Update the src/app/home/home.page.ts file with the following snippet of code.
import { Component } from '@angular/core';
import { LoadingController } from '@ionic/angular';
import { WordPressRestapiService, Post } from '../services/wordpress-restapi.service';

@Component({
  selector: 'app-home',
  templateUrl: 'home.page.html',
  styleUrls: ['home.page.scss'],
})
export class HomePage {

  categoryId: number;
  private posts : Post[] = [];

  constructor(
    public loadingController: LoadingController,
    private wordpressService: WordPressRestapiService) { }

  async ngOnInit() {
    const loading = await this.loadingController.create();
    await loading.present();

    this.loadPosts().subscribe((posts: Post[]) => {
      this.posts = data;
      loading.dismiss();
    });
  }

  loadPosts() {
    return this.wordpressService.getRecentPosts(this.categoryId);
  }
}
The ngOnInit() will create a new loading screen to show that something is happening and to stop any user interaction while the data loads. The posts property is then updated with the data from the WordPress API.
Update the src/app/home/home.page.html file with the following snippet of code.
<ion-header>
<ion-toolbar>
<ion-buttons slot="start">
<ion-menu-button></ion-menu-button>
</ion-buttons>
<ion-title>
Home
</ion-title>
</ion-toolbar>
</ion-header>
<ion-content>
<ion-list>
<ion-item *ngFor="let post of posts" (click)="openPost(post.id)">
<ion-label [innerHTML]="post.title.rendered" text-wrap></ion-label>
<span [innerHTML]="post.date | date:longDate" class="post-date"></span>
</ion-item>
</ion-list>
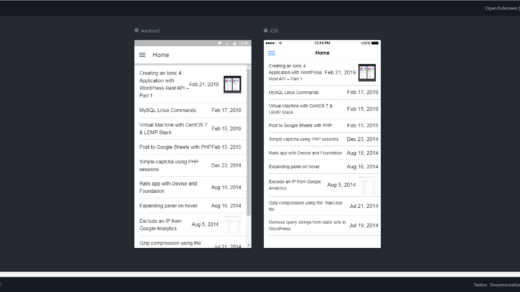
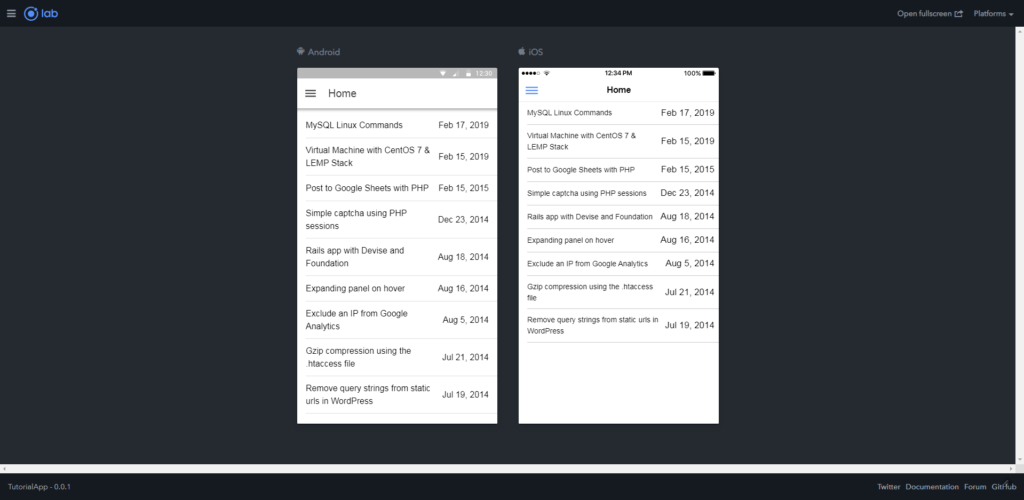
</ion-content>It should now look something like the following;
Navigating to a post
First create a new page to navigate to that will display the full article.
ionic generate page PostThis command will create a new directory called post in the /src/app/ directory.
Now update /src/app/app-routing.module.ts with the following new route.
{
    path: 'post/:id',
    loadChildren: './post/post.module#PostPageModule'
}
The Router library has to be imported at the top of src/app/home/home.page.ts to be able to navigate to the post detail page.
import { Router } from '@angular/router';Then add the following method to src/app/home/home.page.ts to open the post page
openPost(postId) {
  this.router.navigateByUrl('/post/' + postId);
}
This will open a blank page.
Displaying the post
In src/app/post/post.page.html add the following snippet.
<ion-header>
  <ion-toolbar>
    <ion-title>Post</ion-title>

    <ion-buttons slot="start">
      <ion-back-button defaultHref="/"></ion-back-button>
    </ion-buttons>

  </ion-toolbar>
</ion-header>

<ion-content padding>
  <p [innerHTML]="post.date | date:longDate"></p>
  <h1 *ngIf="post.title" [innerHTML]="post.title.rendered"></h1>
  <div *ngIf="post.content" [innerHTML]="post.content.rendered"></div>
</ion-content>
Then update the /src/app/post.page.ts file with the following.
import { Component, OnInit } from '@angular/core';
import { ActivatedRoute } from '@angular/router';
import { LoadingController } from '@ionic/angular';
import { WordPressRestapiService, Post } from '../services/wordpress-restapi.service';

@Component({
  selector: 'app-post',
  templateUrl: './post.page.html',
  styleUrls: ['./post.page.scss'],
})
export class PostPage implements OnInit {

  id: string;
  private post: Post = new Post;

  constructor(
    public loadingController: LoadingController,
    private route: ActivatedRoute,
    private wordpressService: WordPressRestapiService) {}

  async ngOnInit() {

    const loading = await this.loadingController.create();
    await loading.present();

    this.id = this.route.snapshot.paramMap.get('id');

    this.getPost(this.id).subscribe((post: Post) => {
      this.post = post;
      loading.dismiss();
    });
  }

  getPost(postId) {
    return this.wordpressService.getPost(postId);
  }
}
In the wordpress-restapi.service.ts file add the following method to retrieve a single post.
getPost(postId: number): Observable<Post> {
return this.httpClient.get(this.baseRestApiUrl + "posts/" + postId).pipe(
map(post => {
return new Post(post);
}),
catchError(error => {
return Observable.throw('Something went wrong ;)');
})
);
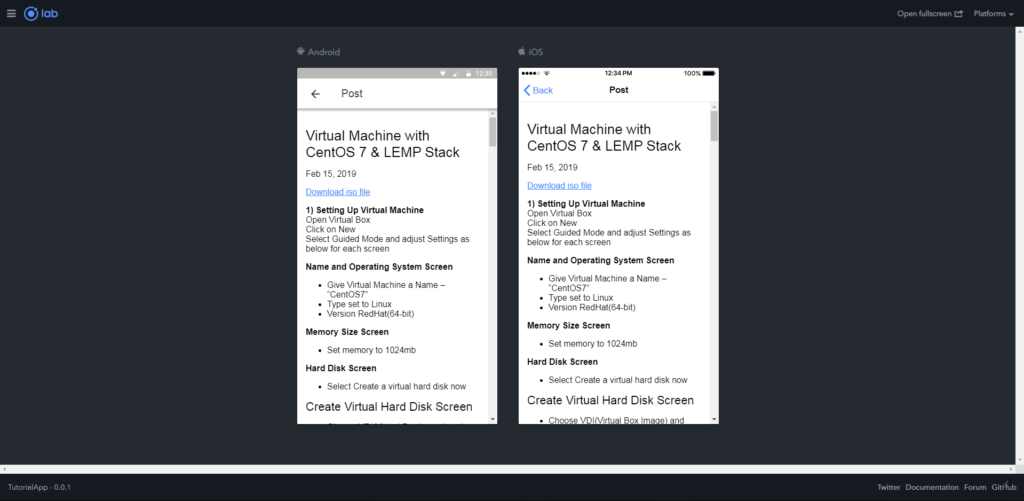
}It should start to look like the below screenshot.
In the next part I’ll look;
- Show featured image on home page and post page.
- Show comments on post page.
- Show tags on post page.
- Show categories on post page.
- And any other additional items like infinite scroll and pull to refresh functionality.